
The third installment of Kaitlin Manning's series on taking better pictures of rare books and ephemera.
After buying a camera, learning how to use it, and setting up your home studio, the natural next step is to actually start taking photos, right?
Ah, would that it were! One very important and often overlooked step for those new to digital photography is to consider how you will process and store your images, otherwise known as creating a “workflow.” This is a crucial step. Your workflow will encompass the entire lifecycle of your images, from calibrating your camera to archiving your files, and therefore must be considered carefully. You will want to commit your workflow to paper, listing out each step of your process so that you can refer back to it, maintain consistency, and ensure fast and easy image retrieval later on.
Ideally, you would carefully plan out your workflow before you even take your first image; in reality, you probably already have a bunch of images on your computer organized in a (more or less) logical way, but which probably do not follow a rigid set of rules. For the moment, don’t worry about the images that you already have – focus on a fresh start. Later on, once you have a solid system in place and as time allows, you may want to consider updating your old files to match your new, gloriously organized ones.
Below is a very brief overview of the basic questions you must consider for a robust and efficient workflow. This is by no means an exhaustive list and should be considered a starting point for thinking about your own unique system. Future posts will discuss some of these ideas more thoroughly, so don’t worry if you aren’t familiar with some of the terminology I’m about to chuck at you. If you are anxious to get started, there are many resources on the web that can provide a more in-depth explanation than what I have time and space for here. I would highly recommend visiting www.dpbestflow.org, which is where I mined a lot of information when I began creating my own workflow. It is run by the American Society of Media Photographers (ASMP) and although it can get a little technical at times, it is an extremely useful resource for digital photography best practices and even includes a glossary of terms.
1. Capturing Images
- What file format will you use? For point and click cameras, this will usually be a jpg; for DSLR cameras, you have the option to shoot in jpg, raw, or a combination of both. And if you don’t know what these terms mean, stay tuned – I will address this in the next post.
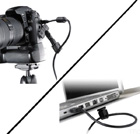 Should you use a tethered system or a memory card? A tethered system means that you have a cable running between your camera and the computer and can view the images you take in real time; a traditional memory card must be removed from the camera and hooked up to your computer to upload images. Each method has advantages and disadvantages.
- What other presets should I know about? Creating a custom white balance is an easy and very important setting that must be done before you start taking photos, and you would do well to get into the habit of formatting your memory card before each session to extend the life of your memory card and limit the chances of data corruption.
2. Upload and Storage
- How will you name your files? It might seem obvious, but every image must have its own unique name. You will probably want this to match your item’s ID number.
- How will you store your files? This refers to where your images will live on your hard drive and how you will name your folders and subfolders. This system should be stable and allow you to expand as your image database grows. There are a variety of ways to set this up (by date, customer, or project, for example), and your system really should depend on what seems most logical to you.
- How will you organize all these photos? Cataloguing software is perhaps one of the most important and powerful tools at your disposal. If you aren’t already using it, this software (like Adobe's Lightroom) will revolutionize how you upload, organize, and retrieve images. Cataloguing software will allow you to attach keywords, captions, and other metatdata to your images in a way that offers a deeper level of organization and allows you to search and sort your files in a number of different ways.
- BACKUP YOUR IMAGES. That isn’t a question. Just do it.
3. Editing and File Conversion
- Which editing software will you use? Photoshop is the gold standard, but Lightroom also offers editing capabilities and there are other very good options out there depending on your needs, including some free programs.
- What file types and sizes are best for your purposes? At the very least, you will need a larger file size for printed media, and smaller files for web upload and email attachments. If you are working with a DSLR camera and have the ability to shoot raw, then you can also take advantage of several file types. For example, you may decide to work in raw, save a large tif file for print, and convert to a smaller jpg for web upload.
4. Archiving
 Where will your images be permanently stored? Images are large files, and when you have many of them, they can start taking up a lot of space on your hard drive. Many photographers opt to have a designated external drive where they keep images alone.
- At what point should I archive my images? This will vary depending on your needs and preferences. Some people will archive as soon as possible following a shoot, other prefer to wait and do it in batches at the end of the week or month.
In the next post, we will begin at the beginning and look more carefully at the capturing stage. I’ll provide some basic tips for ideal camera setting, staging your shoots, and choosing a file format. Yes, the fun continues!
Read "A Guide to Taking Better Photos" part 1...